| Front page › Scanner Control › Introduction | Search | Version: 1.2.1 |
This introduction provides an overview of the general functionality in the IMMS Scanner Control application.
The introduction is divided into the following sections:
Note: The Wi-Fi connection in the application requires mobile data to be enabled in order to function correctly.
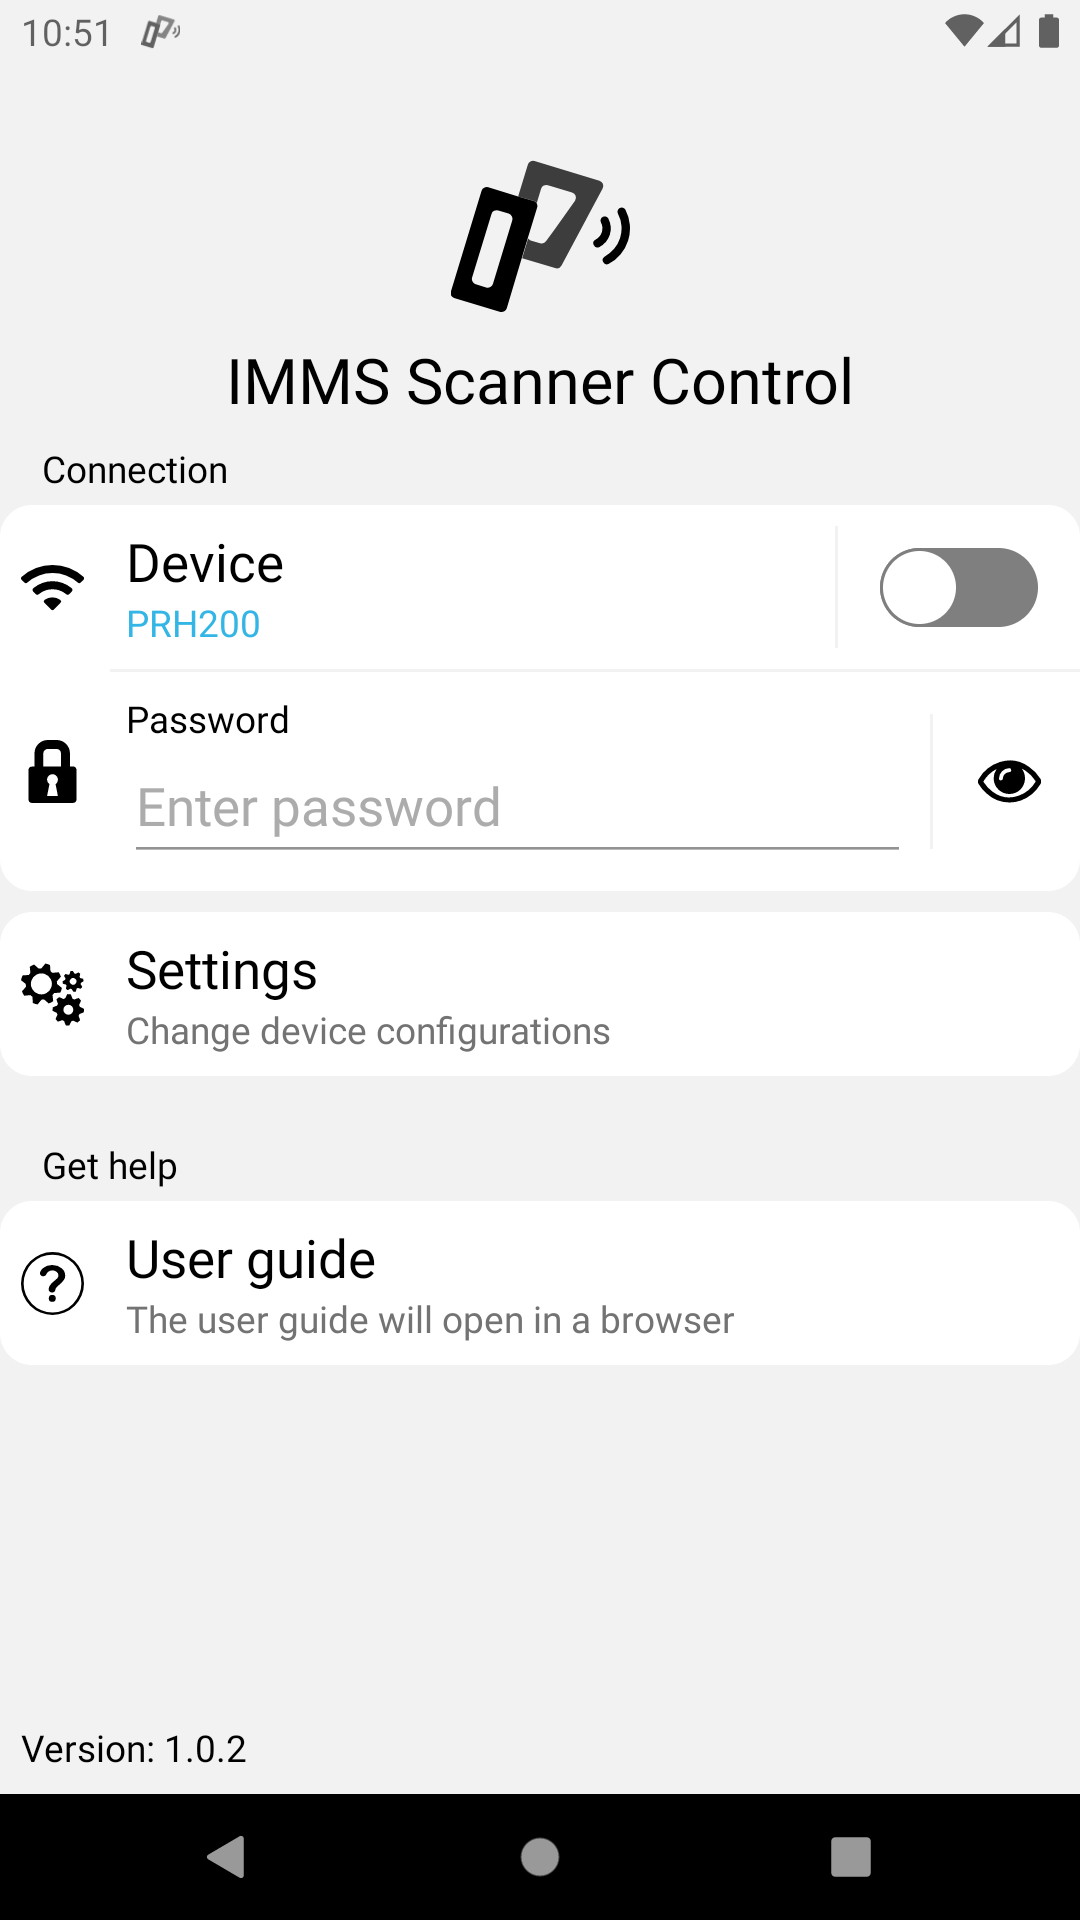
The first time the mobile app is started it must be configured.
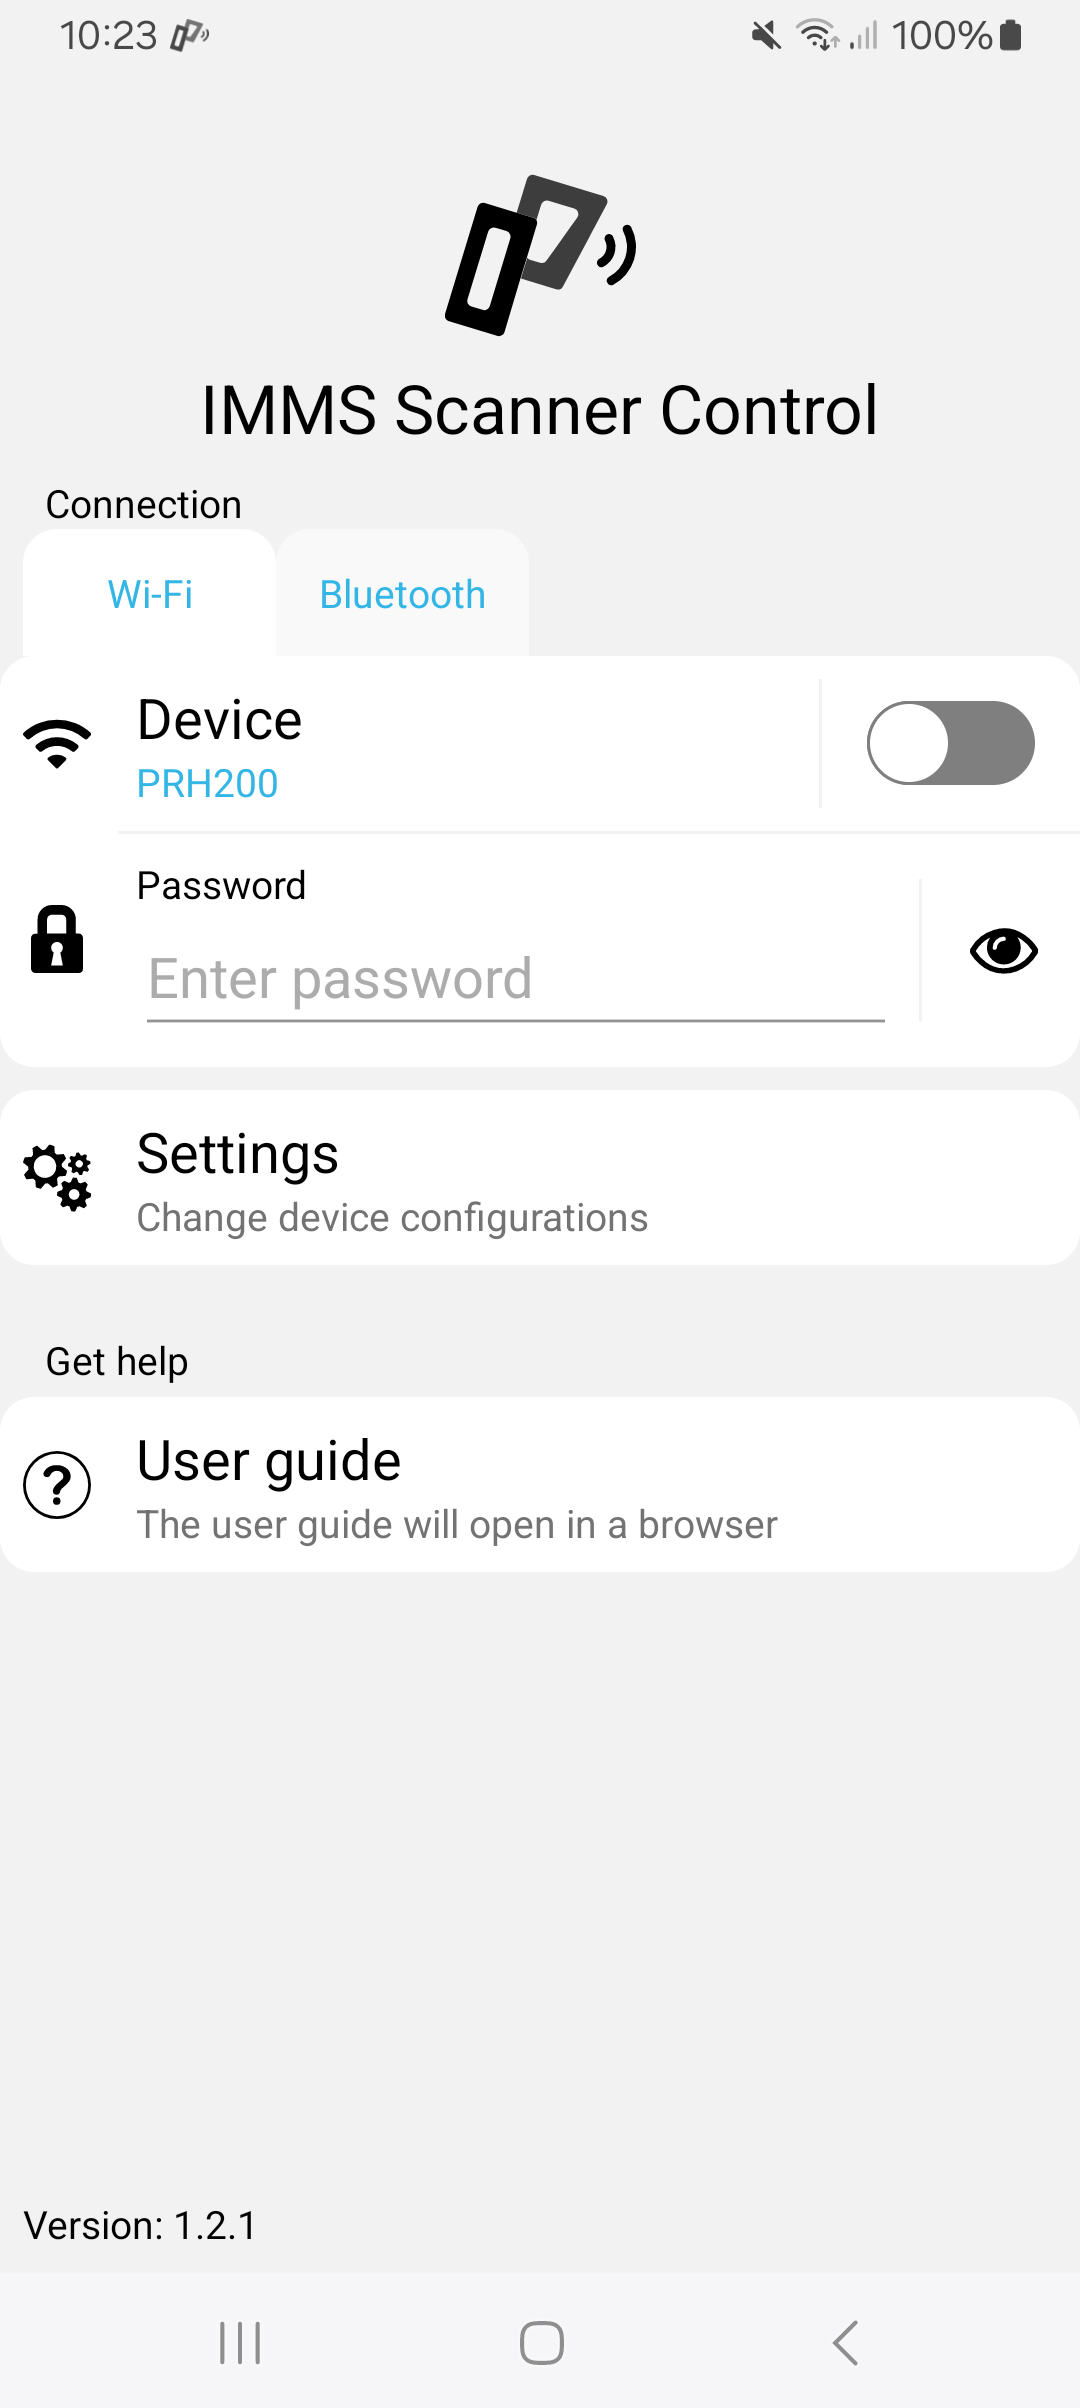
First the connection type is selected, this is either Wi-Fi or Bluetooth.

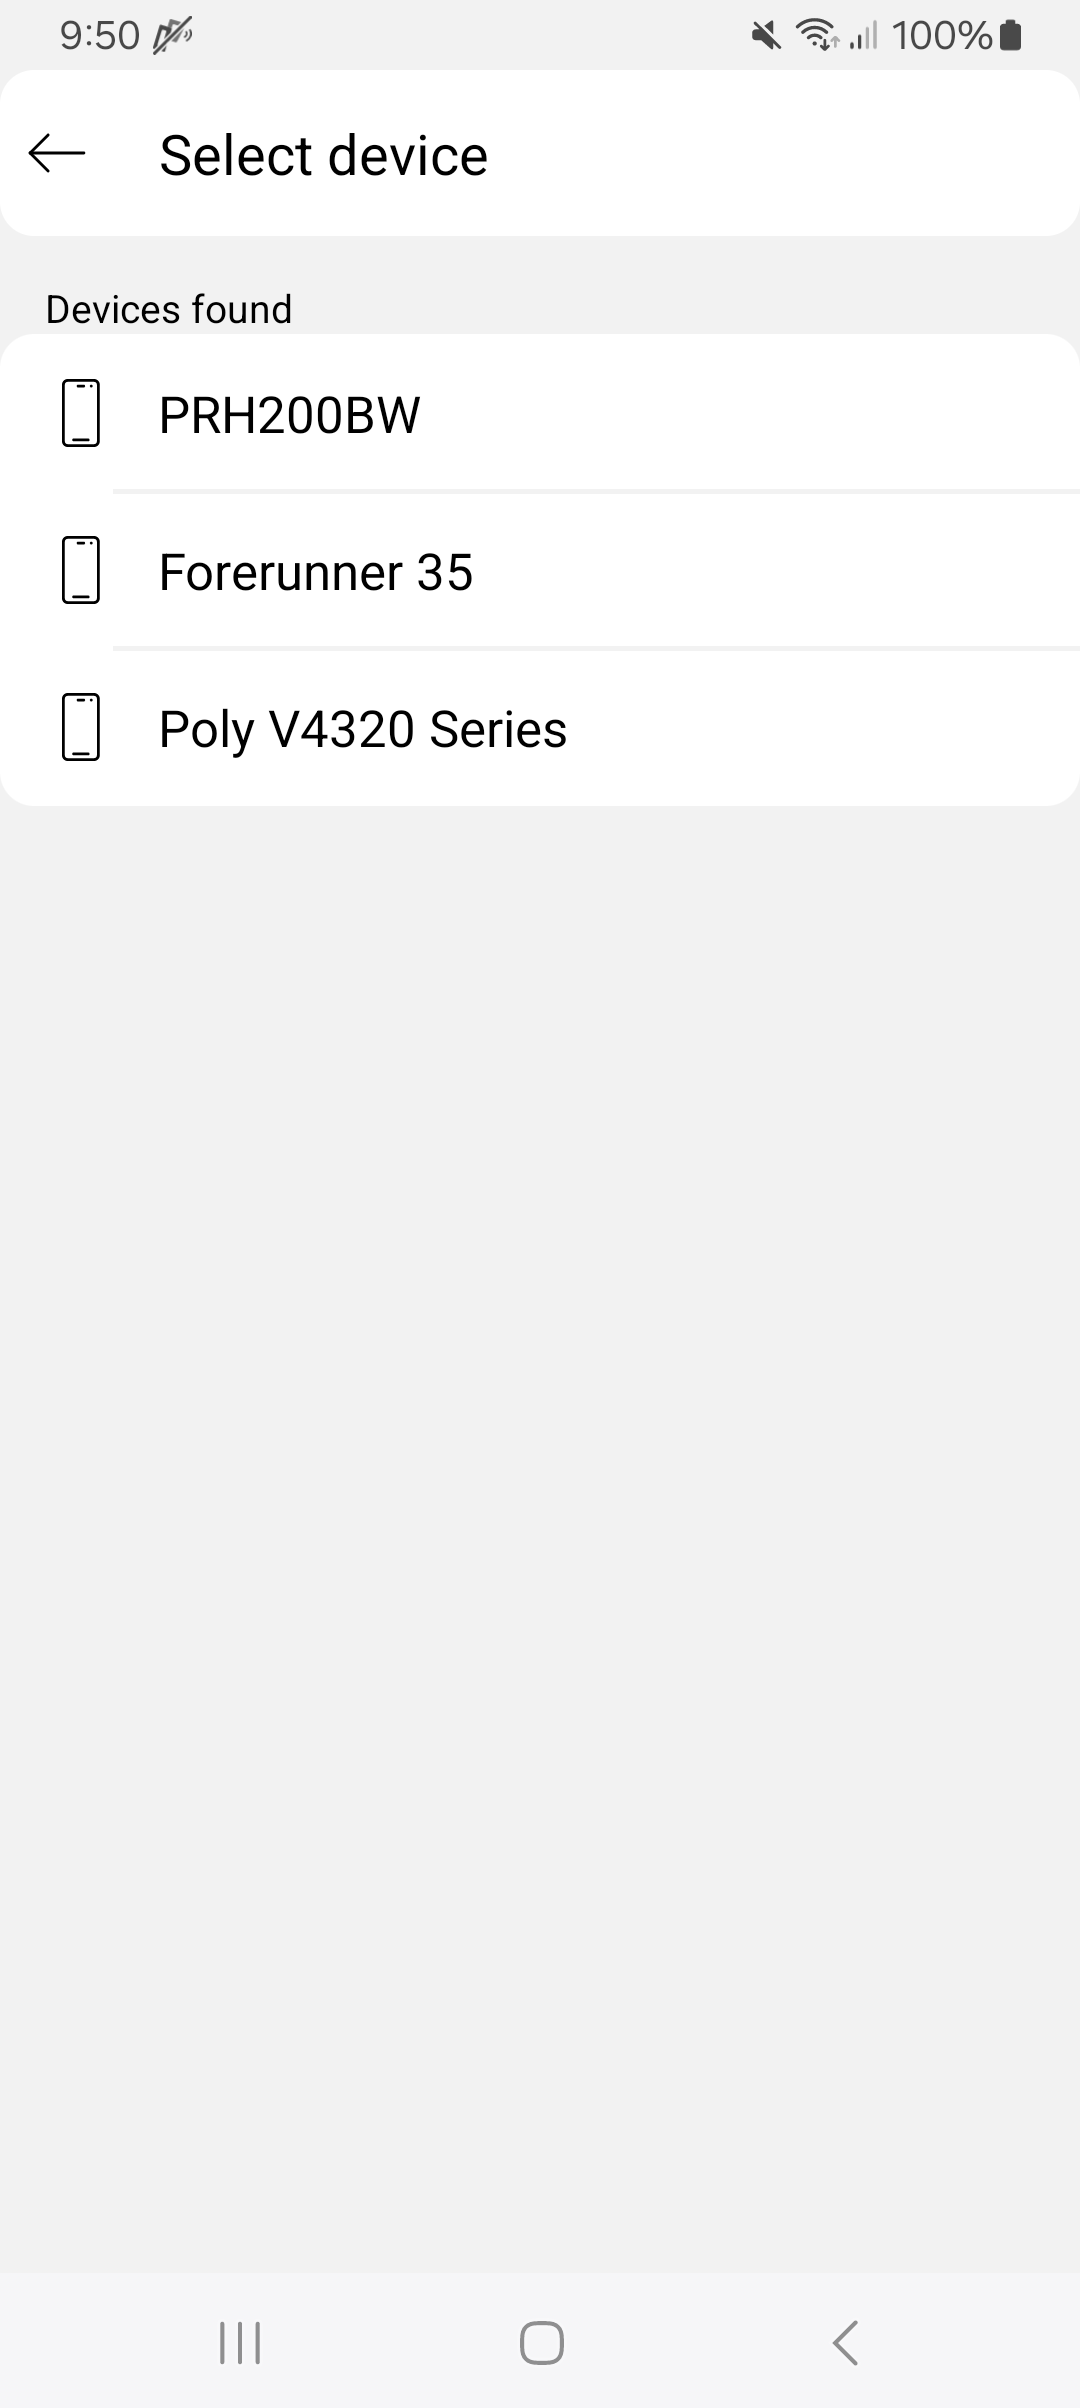
Afterwards the device need to be picked using 'Select Device'(Wi-Fi, Bluetooth).
After the device has been selected, the settings can be changed to fit the current setup (Wi-Fi, Bluetooth).
When the settings are correct, the connection can be started using the start/stop slider, found in the app and in the notification bar.
When a device has been selected, the connection can be started using the start/stop slider to the right.
Status for the connection is shown below.
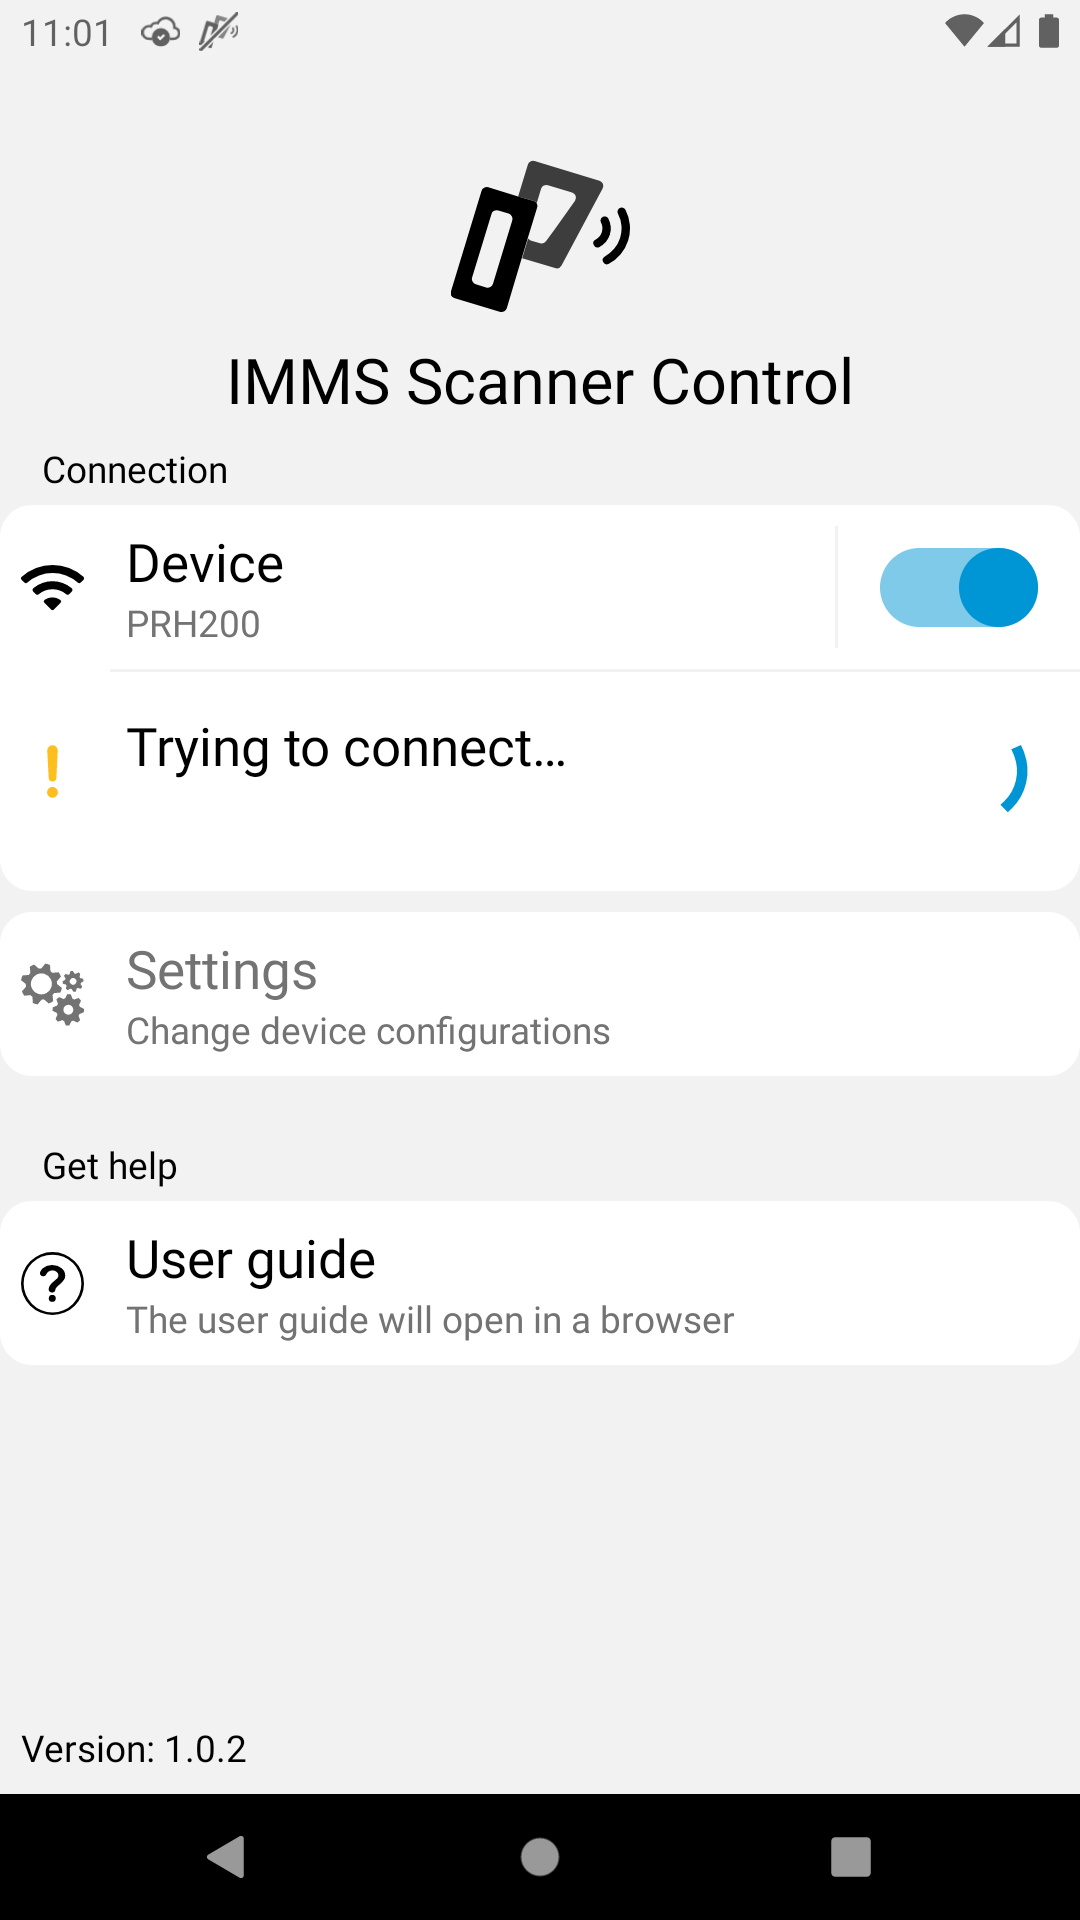
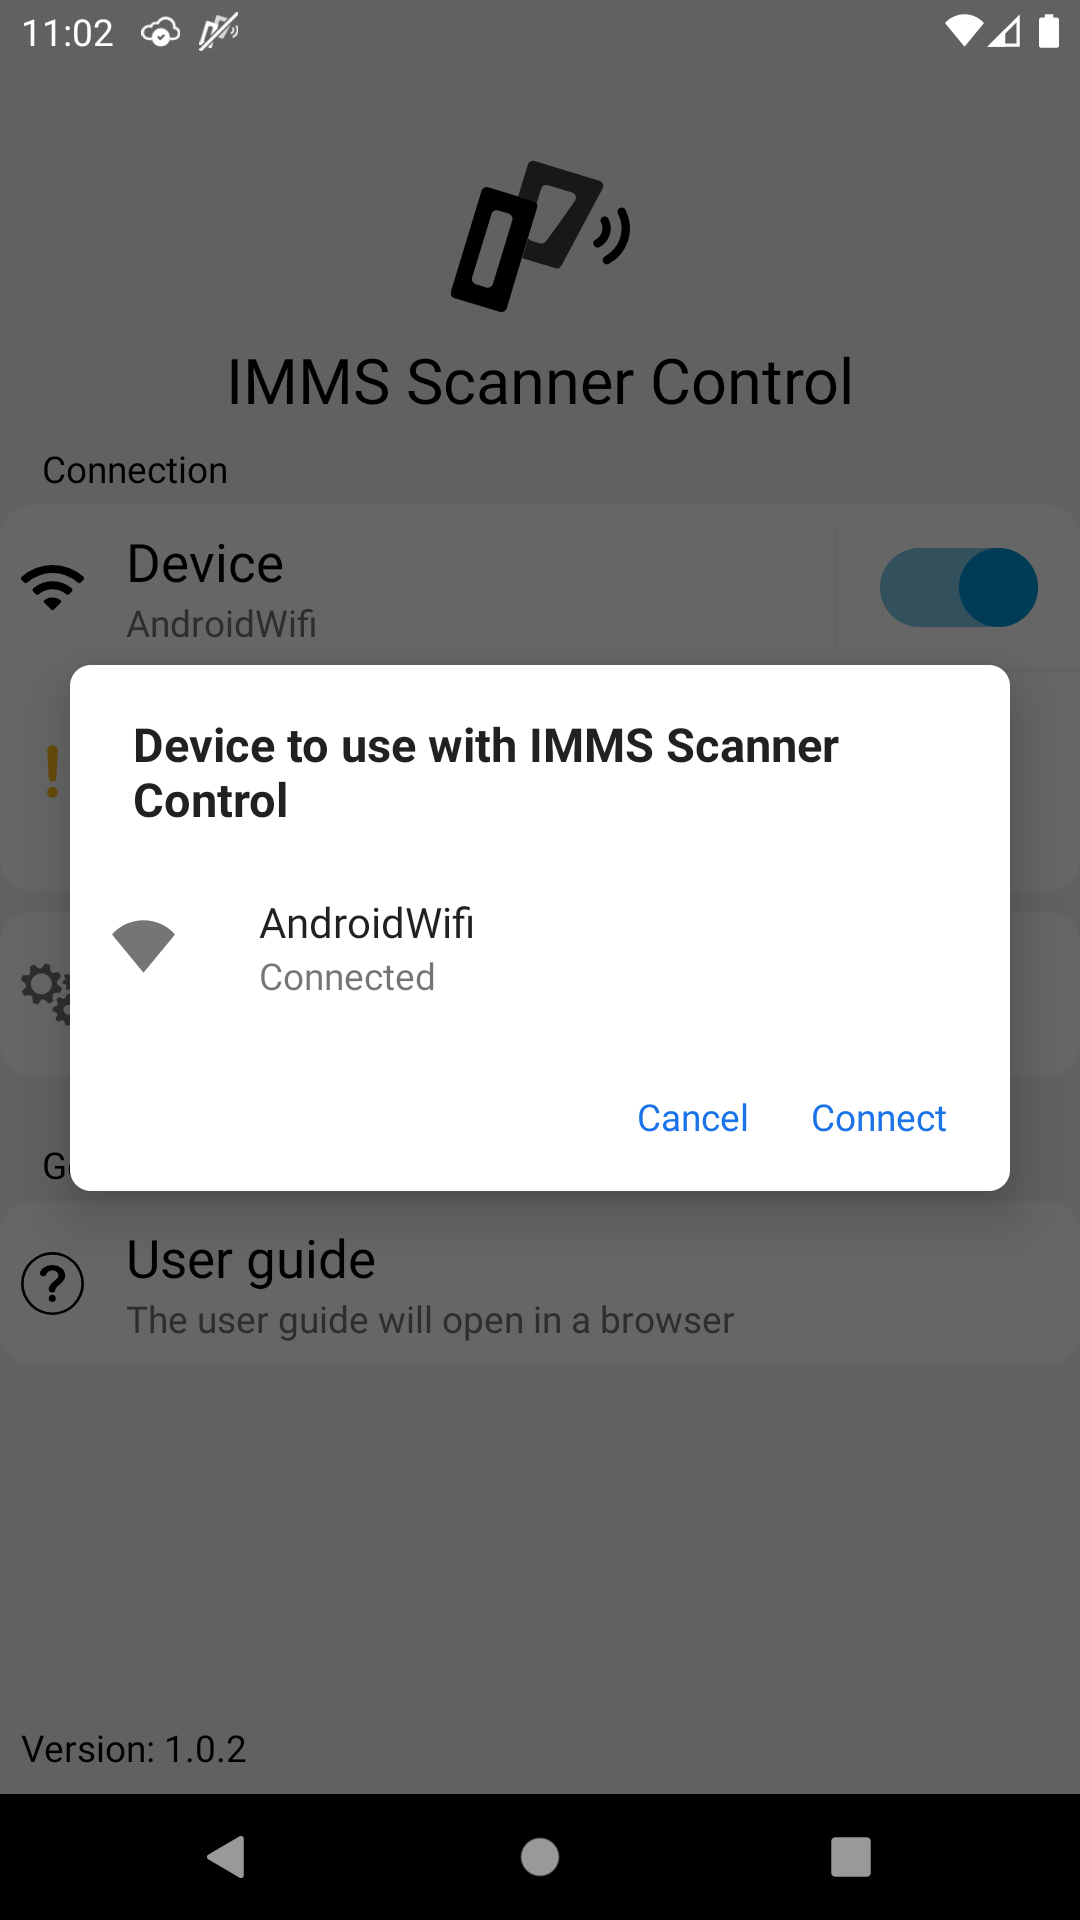
When connecting to the device via Wi-Fi, depending on the version of Android, a dialog asking if you will allow it to connect will show up. Confirm that you wish to connect.
When the connection has been established, the app can be minimized by pressing "back".
Scannings made by the device will now be sent to the IMMS mobile client.
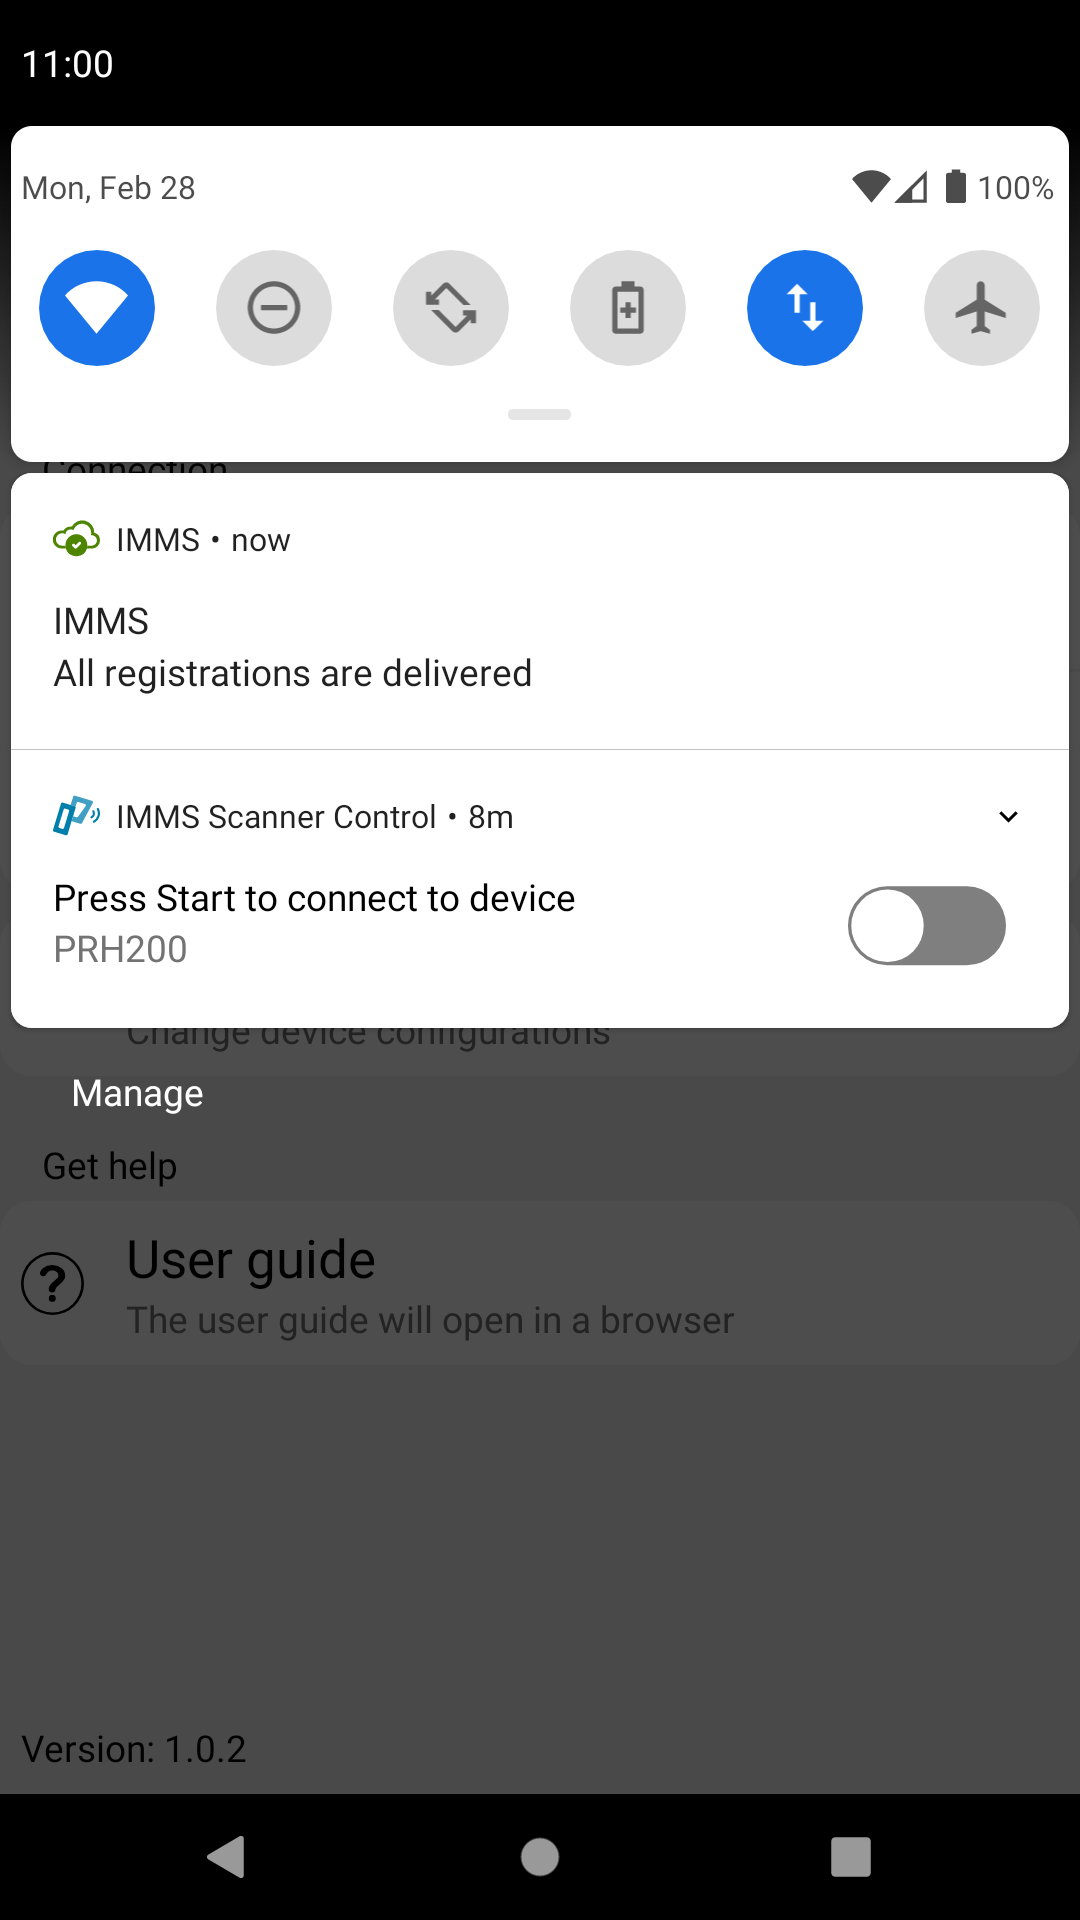
When the application is running a notification icon will appear in the upper left corner. The symbol indicates the status for the connection to the device.
 indicates "all OK". Either the connection has not been started, or a connection has been established.
 indicates "problems". The connection has been started, but no connection has been established yet.
By swiping down from the top of the screen the list of notifications is shown. Here status and start/stop of the connection is available.
By pressing the small arrow on the top right of the notification, the notification can be expanded to reveal an "X" which is used to close the app completely.
The settings menu can be used while setting up and before starting the scanner. The menu is disabled while the scanner is running.
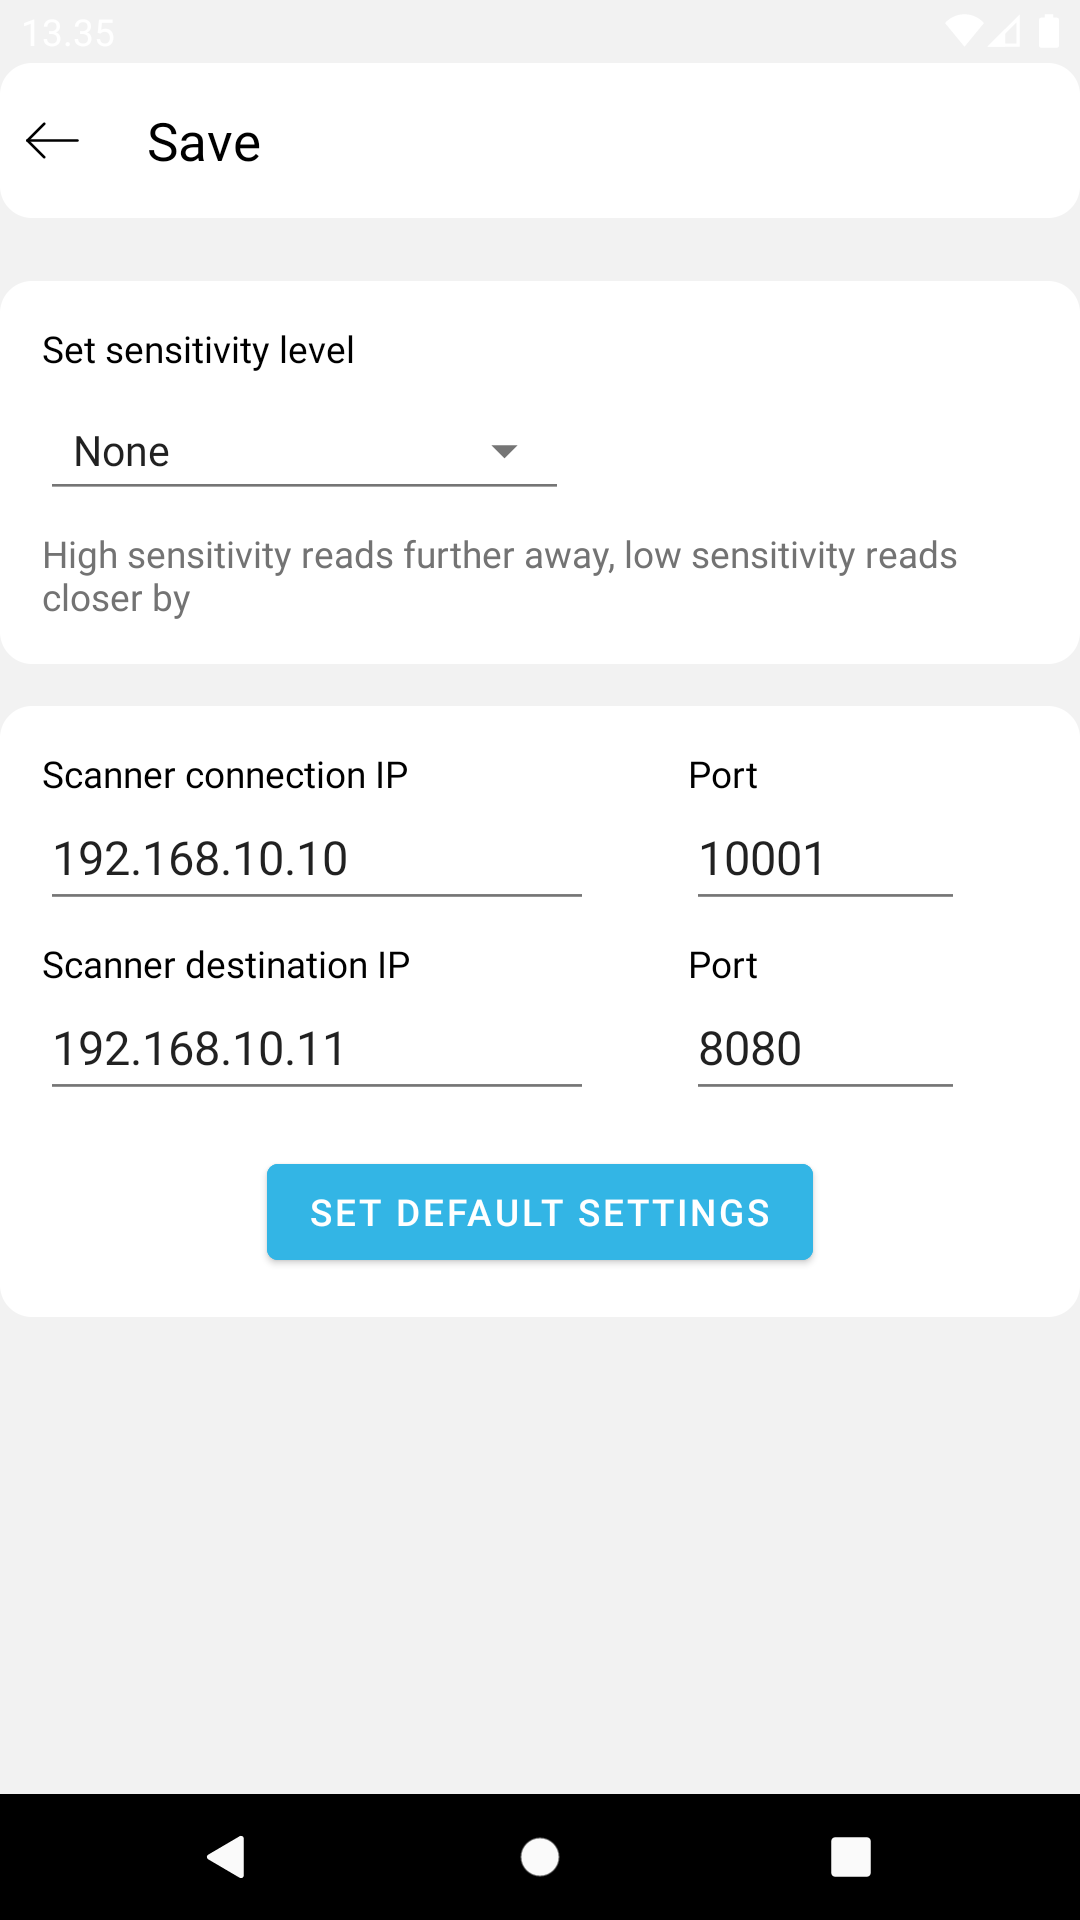
In the settings menu the sensitivity of the scanner can be changed.
The sensitivity scale is from lowest to highest, where lower means closer to the scanner and higher means greater distance.
If "None" is chosen in the sensitivity setting then sensitivity is completely turned off making it possible to get readings that are considered not being within the range of the sensitivity scale.
Note: Additional settings are available depending on connection type.
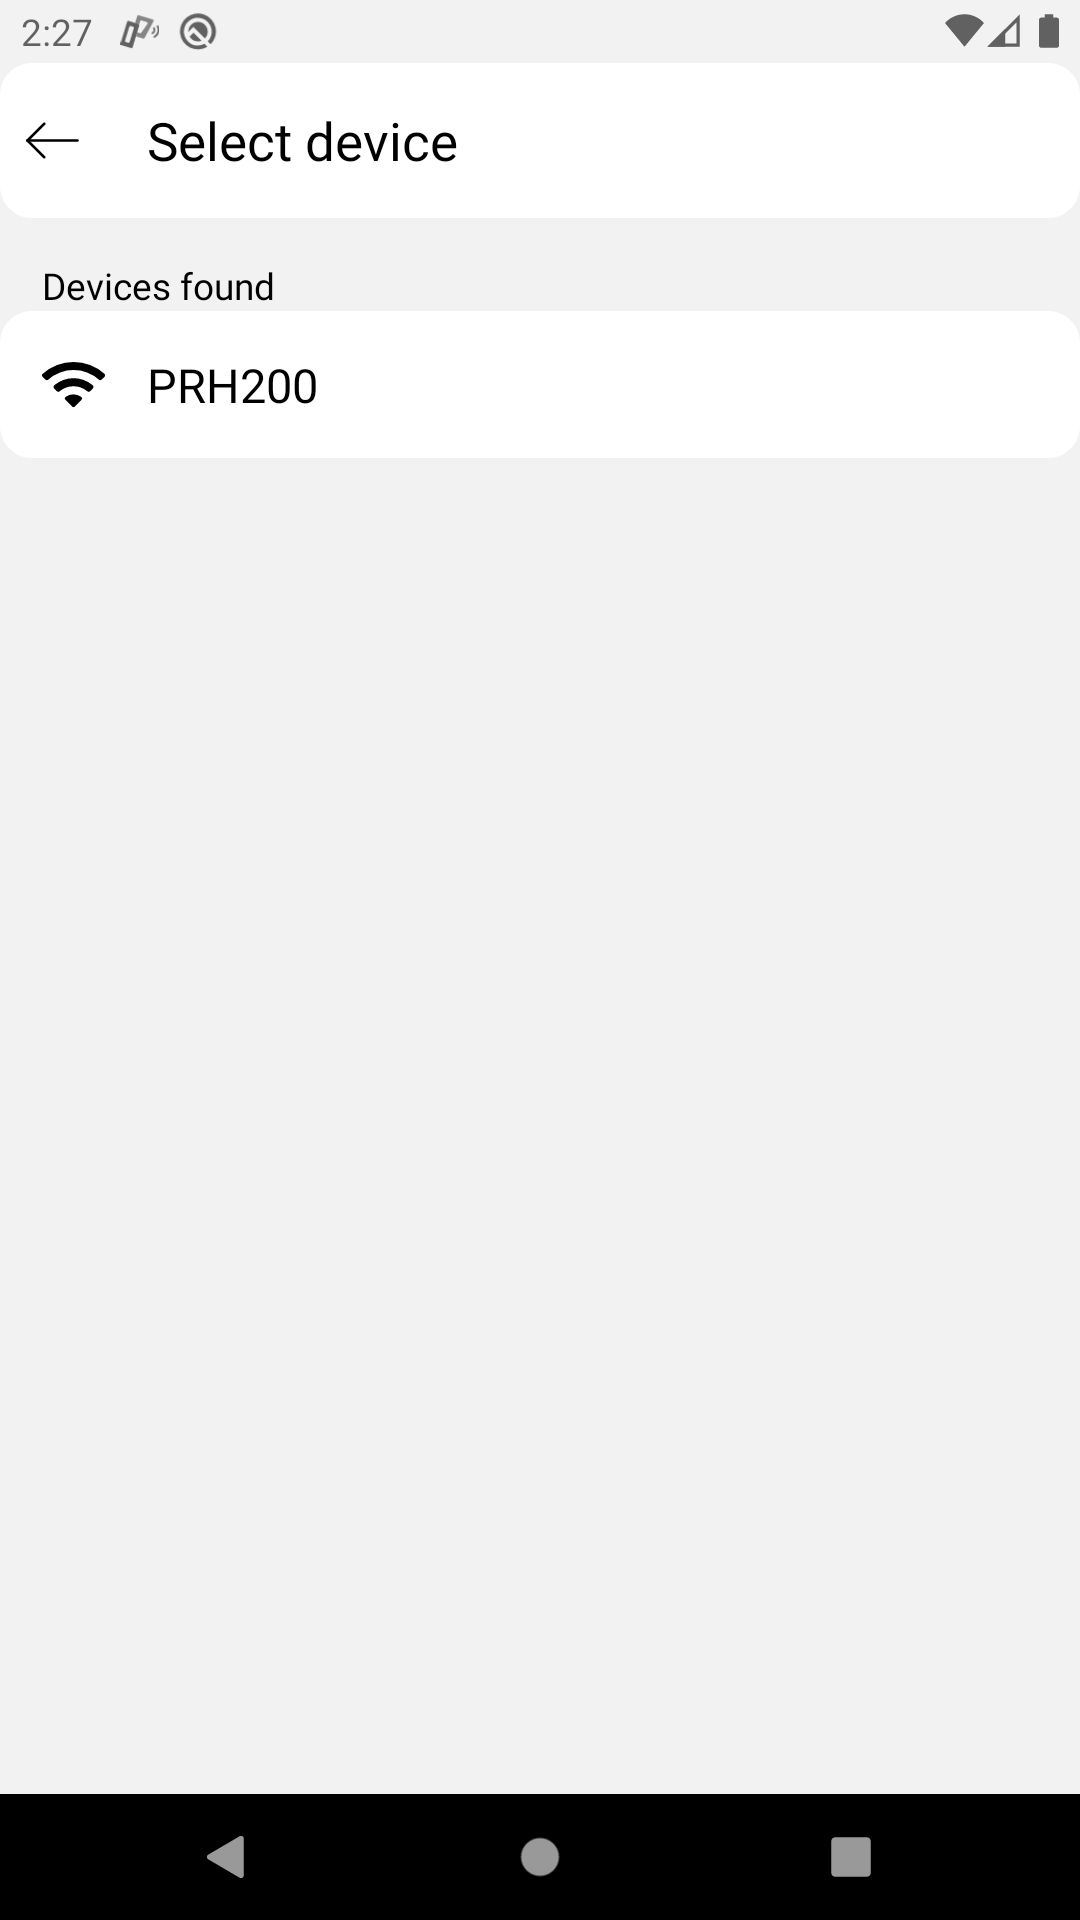
The device selection page list all Wi-Fi networks visible to the phone. The list is split into known and unknown devices.
The currently selected device will be shown in the top bar, choosing a device or tapping the top bar will dismiss the selection page and the selected device will be used.
If a device has a lock icon associated with it, this means the Wi-Fi is password protected and a password. If a password protected device is selected then a password input will be shown on the home screen.
Note: The list will show all Wi-Fi devices available nearby. This means that not only scanners, but also ordinary wireless networks will be shown.
When using Wi-Fi additional IP information for the scanner can be changed:
The connection information for the scanner is used to connect to the scanner (Access Point IP), while the destination information is where the scanner readings are sent to (Device IP).
The button will reset the values to scanner factory default.
The device selection page list all Bluetooth devices visible to the phone. The list is split into known and unknown devices.
The currently selected device will be shown in the top bar, choosing a device or tapping the top bar will dismiss the selection page and the selected device will be used.
Note: The list will show all Bluetooth devices available nearby. This means that not only scanners, but also ordinary Bluetooth devices will be shown.
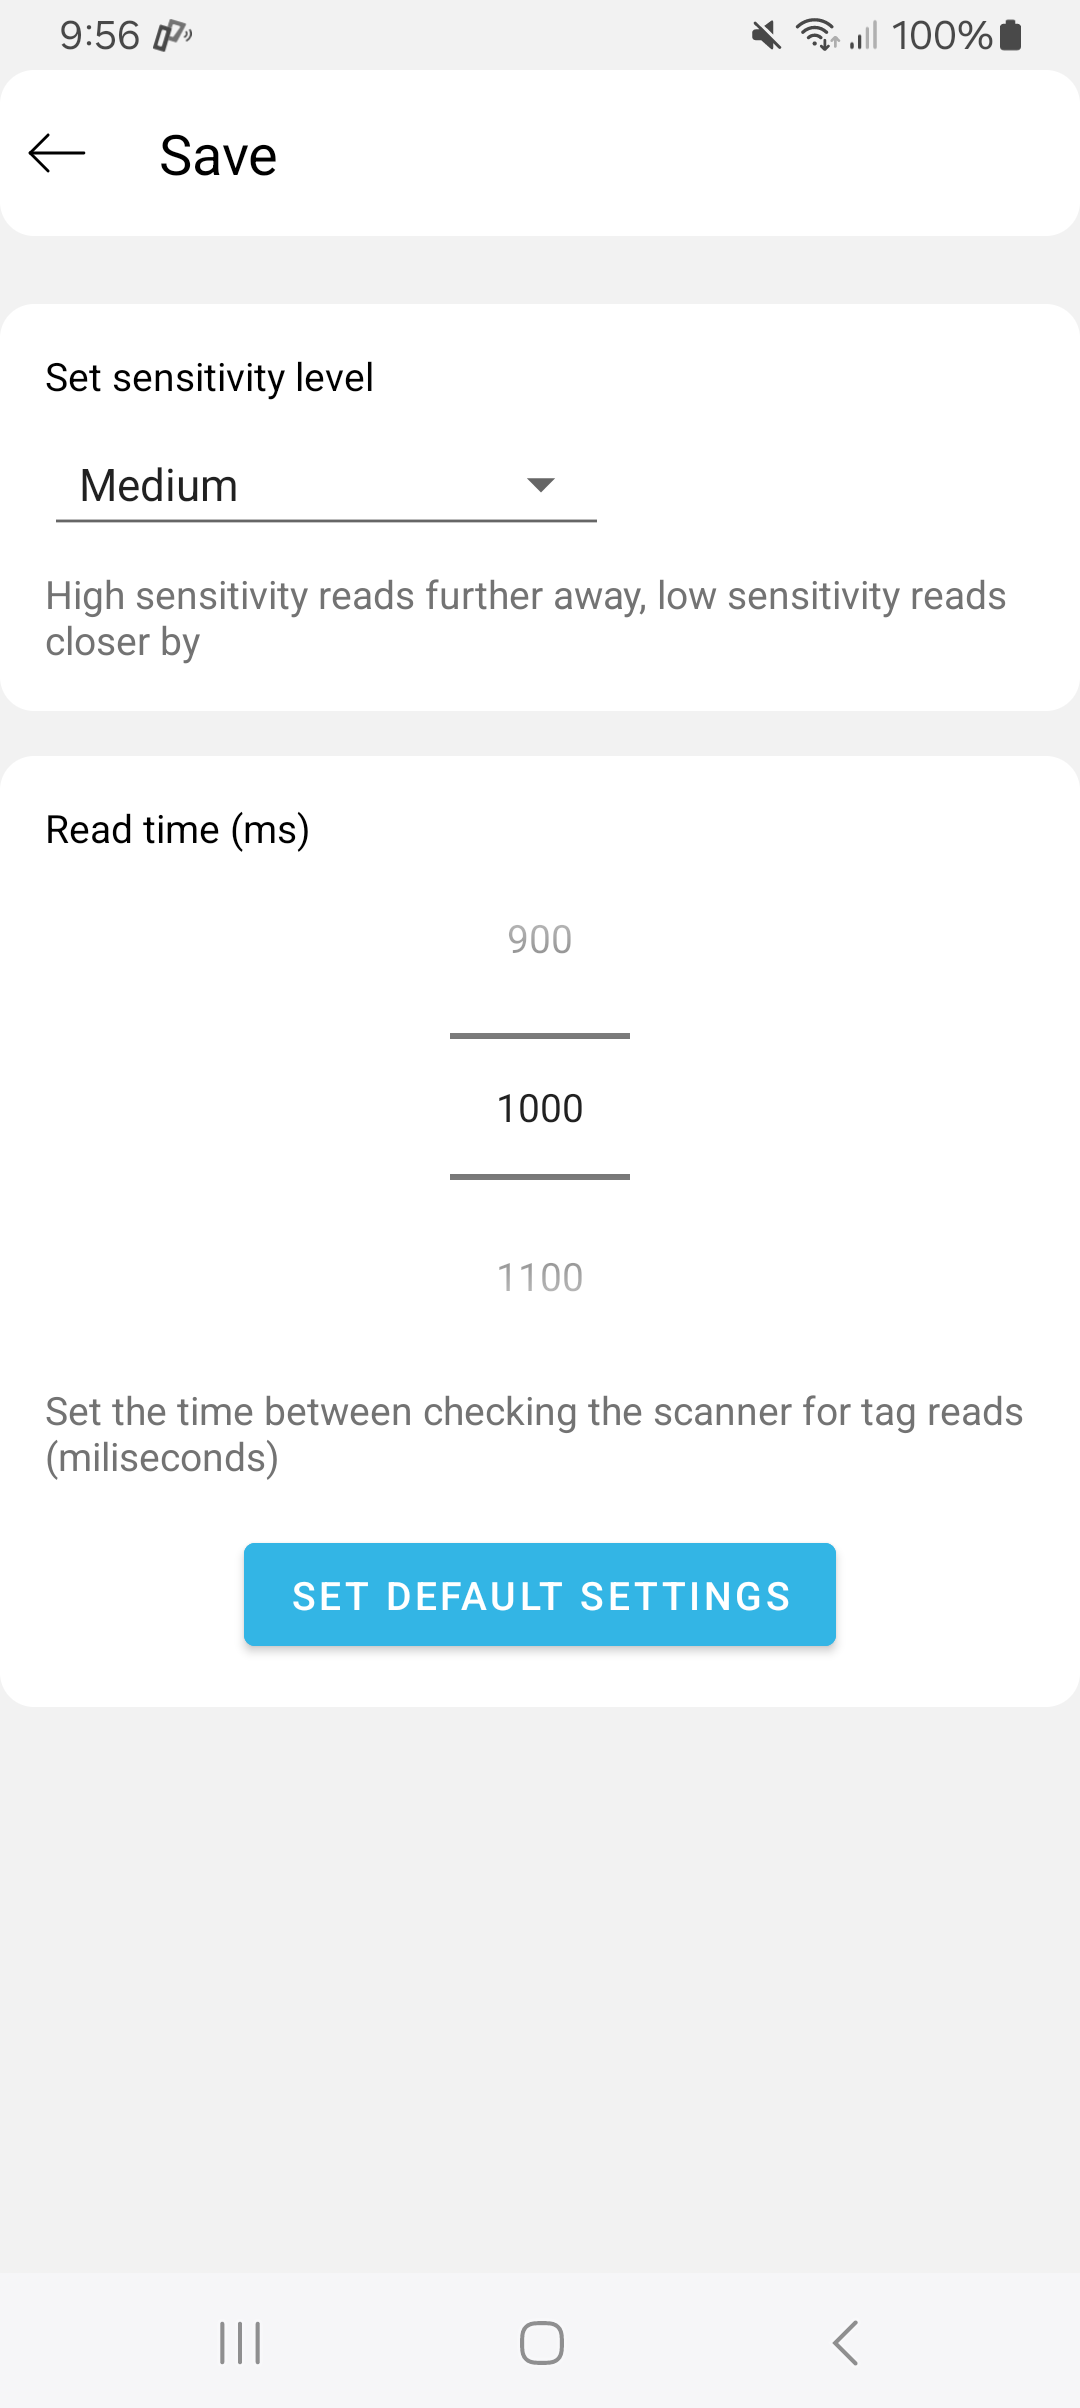
When using Bluetooth additional information for the scanner can be changed:
Read time can be changed between 500 miliseconds (0.5 second) up to 10000 seconds(10 seconds), this is the time between each attempt to check the read bufferer on the FEIG scanning device.
The default value for this setting is 1000 miliseconds (1 second), increasing/decreasing this setting increases/decreases the time between each buffer check on the scanner, and the IMMS application receiving the reading.
Note: Lowering this setting will decrease the time between readings, but will also increase duplicate readings.
The button will reset the values to the default values.